If you’re tired of looking at your plain and uninspired walls, why not give them a new life with textures? While many homeowners focus on bringing a new color to the room, incorporating a unique texture can impart a personality to the space that colors alone cannot do. You can also safeguard your property against decay with our comprehensive wood rot repair and paint solutions for long-lasting protection.
Wall textures are crucial to interior design, adding depth, character, and visual interest to a space. They can transform plain walls into focal points and create an inviting atmosphere. Various techniques, such as sponging, stucco, and Venetian plaster, offer unique effects that can influence the room’s overall aesthetics. Sponging creates a soft, textured look, stucco provides a rustic feel, and Venetian plaster gives a luxurious, polished finish.
These techniques enhance the visual of a room’s appeal and contribute to its ambiance, making wall textures a key element in interior design. Here are the following texture types and steps for applying them to your walls.
Smooth texture
Description and characteristics
Smooth texturing gives walls a sleek, even finish without visible brush strokes or roller marks. It creates a modern, clean look that can make spaces more expansive and polished.
Materials needed
- Drywall compound (joint compound or plaster)
- Sandpaper (various grits)
- Putty knife or trowel
- Primer
- High-quality paint
- Paint rollers and brushes
- Paint tray
- Drop cloths
- Painter’s tape
- Masking film
Step-by-step painting guide
1. Preparation:
- Remove any nails, screws, or fixtures from the wall.
- Cover floors and surrounding areas with drop cloths and painter’s tape.
- Clean the walls to remove dust and debris.
2. Applying Drywall Compound:
- Apply a thin layer of drywall compound to the walls using a putty knife or trowel.
- Spread the compound evenly, filling in any imperfections.
- Allow the compound to dry completely.
3. Sanding:
- Sand the dried compound with fine-grit sandpaper to achieve a smooth surface.
- Wipe away any dust with a damp cloth.
4. Priming:
- Apply a coat of primer to the smooth, sanded walls.
- Let the primer dry according to the manufacturer’s instructions.
5. Painting:
- Pour paint into a paint tray.
- Use a roller to paint large areas and brushes for corners and edges.
- Apply the first coat of paint evenly, using long, smooth strokes.
- Allow the first coat to dry completely.
- Apply a second coat for a uniform finish.
Tips for achieving a perfect, smooth finish
- Use a high-quality roller with a smooth nap for even application.
- Sand between coats if necessary to remove any minor imperfections.
- Don’t overload the roller with paint to prevent dripping.
- Maintain a wet edge to avoid visible lines between sections.
- Ensure proper lighting to spot and correct any imperfections during painting.
Orange peel texture
Description and characteristics
- Description: The orange peel texture resembles the surface of orange skin, with a subtle, dimpled texture.
- Characteristics: It is slightly rough and uneven, providing a visually appealing and faintly reflective finish that hides wall imperfections.
Materials needed
- Primer
- Paint
- Paint sprayer or roller
- Hopper gun (for applying texture)
- Air compressor (if using a hopper gun)
- Drywall compound or texture material
- Sandpaper
- Drop cloths, painter’s tape, and plastic sheeting
Step-by-step painting guide
1. Preparation:
- Cover floors and furniture with drop cloths.
- Tape off areas you don’t want to paint.
- Clean and repair walls.
2. Priming:
- Apply a primer coat to the wall to ensure good adhesion.
3. Mixing texture:
- Mix drywall compound with water to a pancake batter consistency if using a hopper gun.
4. Application:
- Using a hopper gun: Fill the hopper with the texture mixture and adjust the air compressor to a low setting. Spray the texture onto the wall with consistent, circular motions.
- Using a Roller: Use a special roller cover designed for texture when applying the compound.
5. Drying:
- Allow the texture to dry completely, typically 24 hours.
6. Painting:
- Once dry, apply paint over the texture with a roller or sprayer.
Common uses and style tips
- Uses: Commonly used in residential and commercial settings, particularly for walls and ceilings in living rooms, hallways, and bedrooms.
- Style tips:
- Choose a flat or eggshell finish paint to enhance the texture.
- Light colors can make the texture more subtle, while dark colors will highlight it.
- Combine with smooth walls to create an accent wall for visual interest.
Knockdown texture
Description and characteristics
- Knockdown texture is a drywall finishing technique that creates a mottled, stucco-like surface.
- It provides a rustic, textured look that hides imperfections better than a smooth finish.
- The texture is achieved by partially smoothing out a splatter pattern, creating a “knocked down” effect.
Materials needed
- Drywall compound (mud)
- Water
- Trowel or knockdown knife
- Hopper gun or texture sprayer
- Air compressor (if using a hopper gun)
- Drop cloths and masking tape
Step-by-step painting guide
1. Prep the area: Cover floors and furniture with drop cloths. Tape off any areas you don’t want textured.
2. Mix the compound: Combine the drywall compound with water until it reaches a pancake batter consistency.
3. Apply the texture:
- Spray method: Load the compound into a hopper gun connected to an air compressor. Spray the compound onto the wall or ceiling.
- Manual method: Use a trowel or brush to splatter the compound onto the surface.
4. Knockdown: Wait 10-15 minutes until the compound is partially dry. Lightly drag a knockdown knife or trowel across the surface to flatten the peaks.
5. Dry and paint: Allow the texture to dry completely before priming and painting.
Advantages and best applications
Advantages:
- Hides imperfections and minor flaws in drywall.
- Incorporates visual depth and interest in walls and ceilings.
- Durable and easy to maintain.
Best applications:
- Commonly used in living rooms, bedrooms, and hallways.
- Suitable for both residential and commercial settings.
Popcorn texture
Description and characteristics
Popcorn texture (also called cottage cheese or stipple texture) is a ceiling or wall finish featuring a bumpy, uneven surface resembling popcorn kernel. It was popular in mid-20th-century homes due to its sound-dampening properties and ability to hide imperfections.
Materials needed
- Popcorn texture mix (available in pre-mixed or dry form)
- Sprayer or roller designed for textured surfaces
- Drop cloths and painter’s tape to protect floors and trim
- Primer (if needed)
- Paint (latex or acrylic recommended)
- Paint tray and liner
- Brushes for cutting in edges
Step-by-Step Painting Guide
1. Preparation
- Clear the area: Remove furniture, cover floors, and mask off trim with drop cloths and painter’s tape.
- Clean the surface: Dust and clean the walls to ensure paint adhesion.
2. Priming (if necessary)
- Apply primer: Use a primer suitable for textured surfaces if the wall hasn’t been painted before or if changing from a darker to a lighter color. Allow it to dry completely.
3. Painting
- Pour paint into tray: Fill the paint tray with your chosen paint.
- Use the roller: Load the roller with paint, ensuring even coverage.
- Apply paint: Begin rolling the paint onto the wall in sections, using a “W” or “M” motion for even distribution. Avoid pressing too hard to prevent flattening the texture.
- Cut in edges: Use a brush to carefully paint edges and corners where the roller can’t reach.
- Second coat: Allow the first coat to dry completely before applying a second coat (if necessary).
4. Clean Up
- Remove the tape and drop cloths: Peel off painter’s tape carefully and remove drop cloths.
- Clean tools: Wash brushes, rollers, and paint trays thoroughly for future use.
Pros and cons
Pros:
- Sound dampening: It helps to reduce noise levels within a room.
- Hides imperfections: It masks minor flaws and uneven surfaces.
- Aesthetic appeal: It adds a unique, vintage look to a room.
Cons:
- Difficult to clean: The texture can trap dust and cobwebs, making cleaning challenging.
- Outdated look: Considered outdated by some modern design standards.
- Repair challenges: It is challenging to match texture for repairs or patches.
- Asbestos risk: Older popcorn textures may contain asbestos, requiring professional removal.
Sand swirl texture
Description and characteristics:
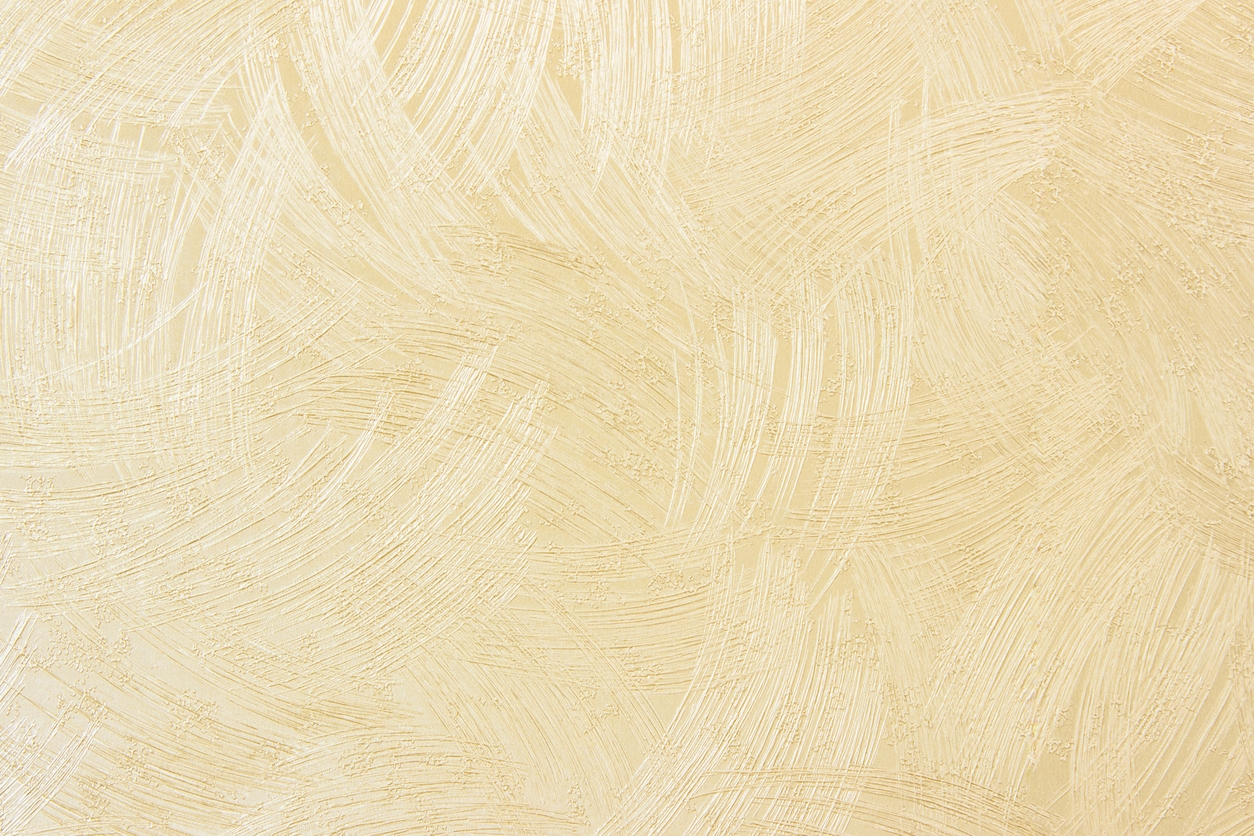
- Sand swirl texture is a decorative wall finish that creates a swirling, textured pattern reminiscent of sand dunes.
- It adds depth and dimension to walls, giving a room a unique and sophisticated look.
- Commonly used on ceilings but can also be applied to walls for a dramatic effect.
Materials needed
- Drywall joint compound or texture paint
- Sand (if not using pre-mixed texture paint)
- Paint roller with a thick nap
- Wide, stiff-bristled brush or sponge
- Mixing bucket
- Painter’s tape and drop cloths
Step-by-step painting guide
1. Preparation:
- Cover floors and furniture with drop cloths.
- Tape off any areas you do not want to texture.
2. Mixing:
- If using a joint compound, mix it with water to a pancake batter consistency.
- Add sand if needed, and stir thoroughly.
3. Application:
- Apply a coat of the mixture to the wall using a roller.
- Work in small sections to prevent drying before texturing.
4. Creating the texture:
- While the mixture is still wet, use the brush or sponge to create swirling patterns.
- Vary the pressure and direction to achieve a natural, random look.
5. Drying and finishing:
- Allow the texture to dry completely.
- Paint over the texture with your chosen paint color for a finished look.
Unique visual effects and where to use It:
- Sand swirl texture creates a dynamic, eye-catching effect that can make a room feel livelier and more expansive.
- Ideal for ceilings to add interest without overwhelming the space.
- Works well in living rooms, bedrooms, and even hallways to create a focal point.
- Can be painted in different colors to match the room’s decor or left in a natural, sand-like color for a more subdued effect.
Conclusion
For additional (and final) tips for choosing the best wall texture, first consider your room’s size and purpose. Second, test small areas to see how the texture looks with different lighting. Finally, ensure the texture complements your overall decor style.
Don’t be afraid to try different textures and techniques. Experimenting with wall textures can add personality and uniqueness to your home. So, have fun and let your creativity shine.
For best results, consider hiring our skilled and dependable team from Custom Painting, Inc. Call us at 925-294-8062 or message us on our contact page for a free consultation and quote. Serving the Bay area including the cities of Bay Point, Diablo, Milpitas, Mountain House and Newark.
We offer wall and ceiling texture application, repair, and paint services to freshen, embellish, and add character to your room. Our team will discuss your vision and get the flawless finish you deserve!


