Removing popcorn or textured ceilings is a project that many homeowners consider to update the look of their homes. While these ceilings were once popular, they can now make a space feel outdated. The process of removing them requires careful planning, the right tools, and some patience.
In this article, we’ll walk you through the essential steps needed to safely and effectively remove popcorn or textured ceilings, helping you achieve a smoother, more modern finish in your home. Modernize your interiors with clean, professional acoustic ceiling removal services.
Preparation and Safety
Before diving into the removal process, it’s crucial to properly prepare and ensure a safe environment. Taking the right precautions will not only make the job easier but also protect your health and home. This section will guide you through the necessary steps to prepare for popcorn or textured ceiling removal.
Importance of Testing for Asbestos and Lead Paint
Popcorn ceilings, especially those installed before the 1980s, may contain asbestos—a hazardous material that can cause serious health issues if inhaled. Similarly, older homes might have ceilings coated with lead-based paint, which poses its own risks. Before starting any removal, it’s essential to test for both asbestos and lead. You can purchase test kits or hire a professional to conduct these tests. If either substance is present, you should not proceed with removal yourself. Instead, contact a licensed abatement professional to handle the job safely.
Gathering Necessary Tools and Materials
Once you’ve ensured your ceiling is free of hazardous materials, it’s time to gather the tools and supplies you’ll need. Common tools include:
- A putty knife or ceiling scraper
- Spray bottle filled with water
- Plastic sheeting or drop cloths
- Painter’s tape
- Protective gear: safety goggles, a dust mask, gloves
- A ladder or step stool
Having everything on hand before you start will help the process go smoothly and reduce interruptions.
Setting Up the Workspace: Covering Floors, Furniture, and Walls
To protect your home from dust and debris, it’s important to properly set up your workspace. Start by removing as much furniture as possible from the room. For items that can’t be moved, cover them with plastic sheeting. Use drop cloths or plastic sheeting to cover the floors, securing them with painter’s tape to prevent slipping. Don’t forget to tape off the walls as well, particularly if they are textured or painted, to avoid damage during the ceiling removal process. This preparation will make cleanup much easier and protect your home from unnecessary mess and damage.
Soaking the Ceiling
Soaking the ceiling is a crucial step in the popcorn or textured ceiling removal process. It helps to soften the material, making it easier to scrape off without damaging the underlying surface. Proper soaking can significantly reduce the effort required and minimize the amount of dust created during removal.
Explanation of Why Soaking Helps with Removal
Popcorn and textured ceilings are often applied with a mixture that includes a water-soluble component, such as a joint compound. When you soak the ceiling, the water penetrates and loosens this material, allowing it to release more easily from the ceiling surface. Without soaking, the texture can be difficult to remove, leading to potential damage to the drywall or plaster underneath. Soaking also helps to keep the dust down, which is important for both cleanliness and safety.
Methods for Applying Water: Spray Bottle vs. Garden Sprayer
There are a couple of effective methods for applying water to the ceiling. The choice between using a spray bottle or a garden sprayer depends on the size of the area you’re working with and your personal preference.
- Spray Bottle: A spray bottle is ideal for small areas or touch-up work. It gives you more control over the amount of water you’re applying, which can be helpful if you’re working in tight spaces or trying to avoid getting water on nearby surfaces.
- Garden Sprayer: For larger areas, a garden sprayer is more efficient. It allows you to cover a broader section of the ceiling more quickly. Most garden sprayers have adjustable nozzles, so you can control the spray pattern to suit the job. This method can save time and ensure a more even application of water.
Waiting Period for Optimal Results
After applying water to the ceiling, it’s important to give it time to soak in for optimal results. Typically, you should wait about 10 to 15 minutes before starting to scrape. This allows the water to penetrate fully, softening the texture and making it easier to remove.
If you find that the ceiling is still difficult to scrape after the initial soaking, you can reapply the water and wait another 10 minutes. Patience is key here; rushing the process can lead to unnecessary damage to the ceiling and more effort in the long run.
Scraping the Texture
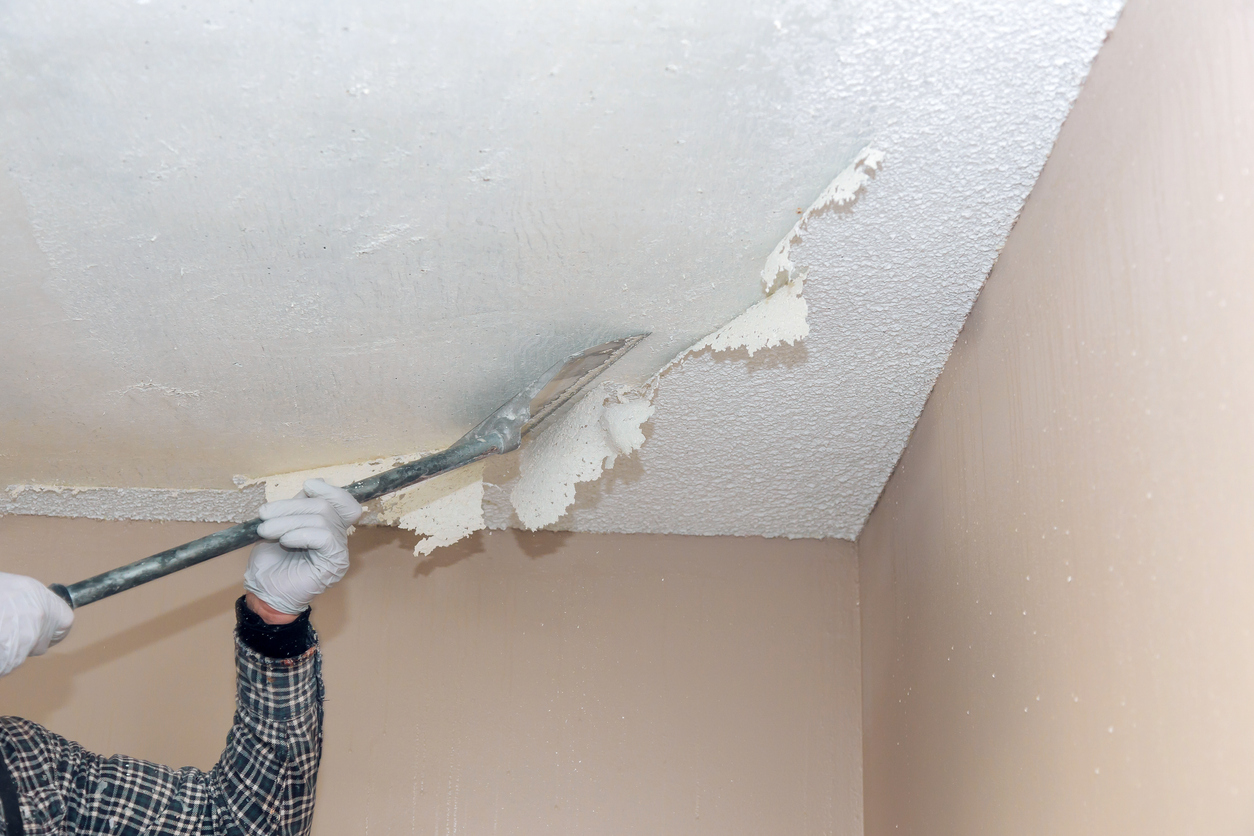
Once the ceiling has been properly soaked, it’s time to begin the actual removal of the popcorn or textured finish. Scraping is the most labor-intensive part of the process, but with the right tools and techniques, you can achieve a smooth, clean surface without damaging the ceiling underneath.
Choosing the Right Tools for Scraping
Selecting the right tools is essential for an effective and damage-free scraping process. Here are the tools most commonly used:
- Wide Putty Knife: A wide putty knife, typically 6 to 12 inches, is a good all-purpose tool for scraping. It offers a broad surface area that can cover more ground with each pass, making the job quicker. Be sure to use a knife with a rounded or slightly beveled edge to reduce the risk of gouging the ceiling.
- Ceiling Scraper: Specialized ceiling scrapers are designed specifically for this type of work. They often come with a built-in bag attachment to catch debris, which can help manage the mess. Some also have extendable handles, so you can work from the ground without needing a ladder.
- Drywall Knife: For smaller or more detailed areas, such as corners or around fixtures, a smaller drywall knife (4 to 6 inches) can be more manageable and precise.
Techniques for Effective and Damage-Free Scraping
To scrape the texture effectively without damaging the underlying surface, follow these techniques:
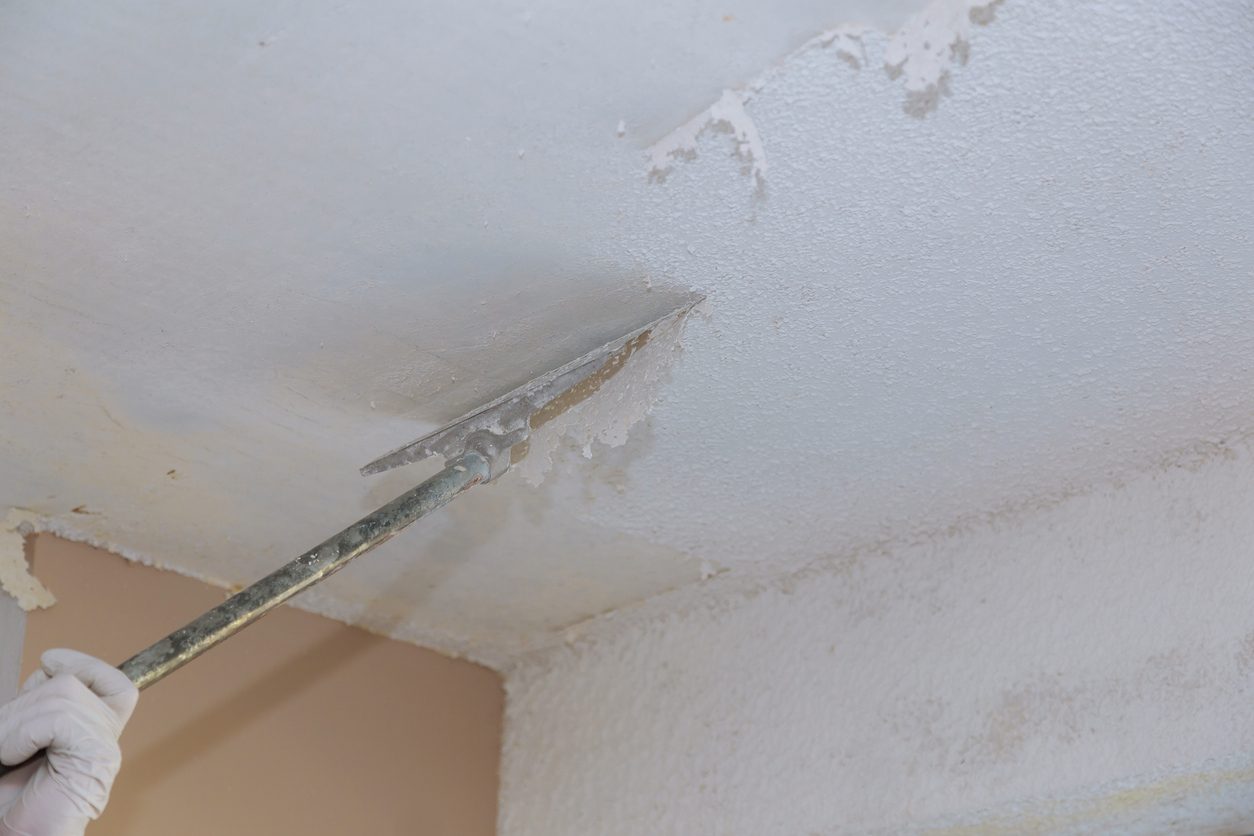
- Gentle Pressure: Start by applying gentle pressure with your chosen tool. Let the soaked texture peel away rather than forcing it off. If you press too hard, you risk gouging the drywall or plaster beneath, which will require additional repairs.
- Angle Your Tool: Hold your scraping tool at a slight angle to the ceiling—around 30 to 45 degrees. This allows the edge of the tool to slide under the texture and lift it off smoothly.
- Work in Small Sections: Instead of trying to tackle large areas at once, work in small, manageable sections. This allows you to maintain better control and ensures that the texture remains adequately soaked as you work.
- Re-soak if Needed: If you encounter stubborn areas where the texture isn’t coming off easily, don’t be afraid to reapply water and wait a few more minutes before trying again. Patience will prevent damage and make the job easier.
Managing Dust and Debris During the Process
Scraping can create a significant amount of dust and debris, even with proper soaking. To manage this and keep your workspace clean:
- Use a Dust Mask: Always wear a dust mask or respirator to protect yourself from inhaling particles. Even if the ceiling doesn’t contain asbestos, the dust can still be irritating to your lungs.
- Set Up a Debris Catching System: If you’re using a ceiling scraper with a bag attachment, much of the debris will be captured automatically. If not, consider using a broad sheet of plastic or a drop cloth directly beneath where you’re working to catch falling material.
- Keep the Area Ventilated: Open windows or use fans to keep air circulating and help clear any dust that becomes airborne. This is especially important if you’re working in a larger room.
- Clean as You Go: Periodically stop to collect and dispose of the debris. This not only keeps your workspace safer but also reduces the risk of stepping on or spreading the mess throughout your home.
By following these guidelines, you’ll be able to scrape your ceiling efficiently, leaving it ready for the next steps in your renovation project.
Repairing and Smoothing the Surface
After the texture has been removed, the next step is to repair and smooth the ceiling. This process ensures that your ceiling is ready for painting or any other finishing touches. Properly assessing and addressing any damage or imperfections will lead to a polished, professional-looking result.
Assessing the Ceiling for Any Damage or Imperfections
Once the popcorn or textured finish has been scraped off, you’ll need to carefully inspect the ceiling for any damage or imperfections that may have been hidden by the texture. Common issues to look for include:
- Nail Holes: Small holes left by nails or screws that need to be filled.
- Gouges or Scratches: These may have occurred during the scraping process or may have been present before.
- Cracks: Hairline cracks in the drywall or plaster should be addressed to prevent them from becoming larger problems.
- Uneven Spots: Areas where the ceiling isn’t completely smooth or level.
Identifying these issues early will help you determine how much repair work is needed before you move on to smoothing the entire surface.
Applying Joint Compound to Fill Holes and Smooth the Surface
To repair and smooth the ceiling, you’ll use a joint compound, also known as drywall mud. Here’s how to apply it effectively:
- Filling Holes and Gouges: Use a putty knife to apply the joint compound directly to any holes, cracks, or gouges. Press the compound into the imperfections, then smooth it out with the knife. For deeper holes, you may need to apply the compound in layers, allowing each layer to dry before adding the next.
- Smoothing Uneven Spots: If you notice any areas that are uneven or bumpy, apply a thin layer of joint compound over the entire area. Use broad, even strokes with your putty knife or a drywall knife to spread the compound smoothly across the surface. The goal is to create a uniform, even finish that will look seamless once painted.
- Allow to Dry: After applying the joint compound, allow it to dry completely. Drying time can vary depending on the thickness of the application and the humidity levels in your home, but typically, it takes about 24 hours.
Sanding the Ceiling for a Flawless Finish
Once the joint compound is fully dry, the next step is to sand the ceiling. Sanding smooths out any remaining imperfections and ensures the surface is perfectly even, ready for primer and paint.
- Choose the Right Sandpaper: Start with medium-grit sandpaper (around 120 grit) to knock down any high spots, then move to finer grit (220 grit) for a final pass. Using a sanding pole will make it easier to reach the ceiling and maintain an even pressure.
- Work in Sections: Sand the ceiling in small sections using light and circular motions. Be careful not to over-sand, as this can create low spots or expose the drywall beneath.
- Check Your Progress: After sanding, run your hand over the surface to check for smoothness. The ceiling should feel completely even, with no noticeable bumps or ridges. If you find any areas that need additional attention, apply more joint compound, let it dry, and sand again.
- Clean Up Dust: Sanding creates a lot of fine dust, so be sure to wear a dust mask and goggles. After sanding, thoroughly clean the ceiling and surrounding areas with a vacuum or damp cloth to remove all dust particles before proceeding to priming and painting.
By carefully repairing and smoothing the ceiling, you’ll create a flawless surface that sets the stage for a beautiful, updated finish.
Priming and Painting
After the ceiling has been repaired and smoothed, the final steps to achieving a polished, updated look are priming and painting. These steps are crucial for sealing the surface, ensuring good paint adhesion, and achieving a durable, attractive finish.
Importance of Priming the Ceiling Before Painting
Priming the ceiling is an essential step that should not be skipped. Primer serves several important purposes:
- Seals the Surface: Primer helps to seal the porous surface of the drywall or joint compound, preventing the paint from being absorbed unevenly. This leads to a more uniform color and finish.
- Improves Paint Adhesion: Primer creates a better surface for the paint to adhere to, which reduces the risk of peeling, cracking, or blistering over time.
- Hides Imperfections: A good primer can help to hide small imperfections and create a smooth, even base for the paint. This is especially important on ceilings that have been repaired or sanded.
Skipping the primer can result in a less durable paint job that may need touch-ups or repainting sooner than expected.
Choosing the Right Primer and Paint for a Smooth, Durable Finish
Selecting the right primer and paint is key to achieving a smooth, long-lasting finish on your ceiling.
- Primer: Choose a high-quality, stain-blocking primer that is specifically designed for ceilings or drywall. If your ceiling has any stains, discoloration, or if you’re covering a dark color, a primer with good stain-blocking properties is particularly important. Consider using a primer with a built-in tint that matches your paint color to enhance coverage.
- Paint: For the topcoat, use ceiling paint or flat latex paint. Flat or matte finishes are ideal for ceilings because they reduce light reflection, which helps to hide imperfections. If you’re painting in a kitchen or bathroom, consider using a paint with moisture and mildew resistance. For added durability, look for paint labeled as “washable” or “scrubbable.”
- Color: While white is the traditional choice for ceilings, don’t hesitate to explore other colors if it suits your design vision. Soft neutrals or light colors can add warmth and depth to a room.
Tips for Achieving an Even Coat and Professional Look
To achieve a professional-looking finish, follow these tips when priming and painting your ceiling:
- Use a Roller with an Extension Pole: A roller with a long handle or an extension pole makes it easier to reach the ceiling without straining. Choose a roller with a thick nap (around 3/8 to 1/2 inch) to hold more paint and apply it evenly.
- Cut in First: Start by “cutting in” around the edges of the ceiling with a brush. This involves painting a border where the ceiling meets the walls, around light fixtures, and in corners. This will ensure clean lines and prevent you from accidentally bumping the walls with your roller.
- Apply the Primer First: Apply the primer in even, overlapping strokes, working in small sections to maintain a wet edge and avoid lap marks. Allow the primer to dry fully according to the manufacturer’s instructions before applying paint.
- Paint in Thin, Even Coats: When it’s time to paint, apply the paint in thin, even coats. Avoid overloading the roller with paint, which can lead to drips and uneven coverage. Roll in a “W” or “M” pattern, then fill in the gaps by rolling over them. This technique helps to distribute the paint more evenly.
- Maintain Consistent Pressure: Apply consistent pressure on the roller as you work across the ceiling. This will help you achieve a smooth, uniform finish without streaks or lines.
- Inspect and Apply a Second Coat if Needed: After the first coat of paint has dried, inspect the ceiling for any missed spots or uneven areas. If necessary, apply a second coat to ensure complete coverage and a polished appearance.
By following these steps, you can achieve a smooth, even finish that transforms your ceiling, giving it a fresh, updated look that complements your space.
Final Thoughts
Removing a popcorn or textured ceiling can be a challenging task, but with the right preparation and steps, you can achieve a smooth, modern finish. From testing for hazardous materials to priming and painting, following these guidelines will help you complete the project successfully. Serving the Bay area including the cities of Concord, Danville, Diablo, Dublin and Fremont.
If you need professional assistance, don’t hesitate to contact Custom Painting, Inc. at 925-294-8062 or through our contact form. We’re here to help you transform your space with expert care and attention to detail.


