
If you’re looking to enhance your home’s appearance, consider stucco. It is a durable and versatile building material made from cement, sand, and water. You can apply stucco as a protective or decorative coating for your walls and ceilings. Many homeowners value stucco for its textured finish, which they can change into various designs. Revive your exterior with professional stucco painting and repair that protects against weather and enhances curb appeal.
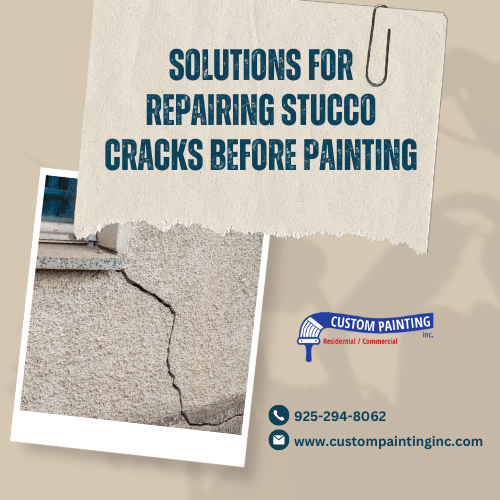
If your home already has stucco, inspect it for cracks and repair them before painting. Regular inspections and maintenance on stucco walls are crucial for many reasons. They prevent water damage, ensure paint adhesion, and maintain the building’s structural integrity.
Identifying types of stucco cracks
Stucco cracks can be categorized into several types based on their appearance and underlying causes. Each type provides clues about the possible causes and the underlying issue’s extent. Identifying these cracks on your stucco guides you to appropriate repair strategies.
- Hairline cracks – Very thin cracks, often less than 1/16 inch wide. They are often caused by minor settling or slight shrinkage during the curing process.
- Map cracking (crazing) – A network of fine, interconnected cracks resembling a spider web or a road map. Rapid drying or over-troweling during application are possible causes.
- Diagonal cracks – Cracks running diagonally, often at 45 degrees. They indicate structural movement, such as foundation settling or seismic activity.
- Vertical cracks – Cracks running vertically, often appearing at stress points like window and door openings. Building settling or thermal expansion and contraction are possible causes.
- Horizontal cracks – Cracks running horizontally, often at the juncture between different building materials. Differential movement between the materials can be the cause.
- Corner cracks – Cracks appearing at the corners of windows, doors, or other wall openings. Stress concentrations and movement at these points can be the cause.
- Pattern cracks – Cracks forming a regular pattern, such as a grid. Expanding or contracting laths (the framework that holds the stucco) are probable causes.
- Structural cracks – Larger and more significant cracks indicate underlying structural issues. These cracks often need immediate attention and repair.
Tools and materials needed
You will need the following tools and materials for stucco repair and painting. They help ensure a thorough and effective process.
Tools
- Hammer – For removing loose stucco.
- Chisel – For chipping away damaged stucco.
- Wire Brush – For cleaning the surface and removing debris.
- Trowel – For applying the stucco mix.
- Hawk – A flat surface for holding the stucco mix while applying.
- Utility knife – For cutting materials.
- Putty knife – For minor repairs and detailing.
- Stucco float – For smoothing and finishing the surface.
- Bucket – for mixing stucco.
- Drill with mixing paddle – For mixing stucco thoroughly.
- Caulking gun – For applying sealant.
- Sandpaper – For smoothing the surface after repair.
- Spray bottle – For moistening the surface during application.
- Drop Cloths – For protecting surrounding areas during repair and painting.
- Painter’s tape – For masking off areas not to be painted.
- Paintbrushes and rollers – For applying paint.
- Ladder – For reaching high areas.
Materials
- Stucco mix – Pre-mixed or components for mixing on-site.
- Bonding agent – Helps new stucco adhere to old surfaces.
- Mesh or lath – For reinforcing large repair areas.
- Sealant or caulk – For filling cracks and gaps.
- Primer – For preparing the stucco surface before painting.
- Exterior paint – Appropriate for stucco surfaces, usually acrylic-based.
- Patch compound – For minor cracks and holes.
- Water – For mixing and application purposes.
- Protective gear – Gloves, safety glasses, and dust mask.
Preparation steps
Cleaning the stucco crack: Importance of removing dust and debris
Cleaning the stucco crack is crucial. Dust, debris, and loose particles can prevent the repair material from correctly adhering to the existing stucco.
Non-removal of these contaminants can cause the patch to bond incorrectly. It can lead to premature failure of the repair. Proper cleaning ensures a durable repair integrating seamlessly with the surrounding stucco. It helps maintain the surface’s structural integrity and aesthetic appearance.
Preparing the area: Techniques for ensuring good adhesion of the repair material
- Scraping and brushing – Use a wire brush or a scraper to remove loose stucco, paint, and debris around the crack. This exposes a clean, solid surface for the repair material to adhere to.
- Washing – Rinse the area with water to eliminate any remaining dust. Use a mild detergent for stubborn dirt. After cleaning, rinse the area thoroughly with clean water. Allow the area to dry completely before proceeding.
- Priming – Apply a bonding agent or primer to the cleaned and dried crack. This step enhances adhesion by providing a tacky surface for the new stucco to grip onto.
- Keying the surface – For larger cracks, use a chisel to widen the crack slightly and create an inverted V-shape. This technique, called keying, helps lock the repair material into place, preventing it from popping out.
Repair techniques for every stucco crack
Here are the following repair techniques for various types of stucco cracks. In addressing every crack, identify the underlying issues causing it. This helps prevent cracks from recurring. Matching the texture and color of the existing stucco is also crucial for a seamless repair.
- For hairline cracks – Use a pre-mixed stucco patch or a thin slurry of stucco mix. Apply it with a putty knife or trowel, then smooth and blend it with the surrounding surface. Ensure the patch is thoroughly worked into the crack.
- For map cracking (crazing) – Apply a thin coat of elastomeric paint or a stucco-compatible sealer to bridge the cracks and prevent water intrusion.
- For diagonal cracks – Use a flexible sealant or polyurethane caulk to fill the crack. Use fiberglass mesh tape over larger cracks, then apply stucco patch material.
- For vertical cracks – For narrow cracks, fill them with a flexible (elastomeric), paintable caulk. For wider cracks, apply a stucco patch compound. It ensures proper bonding and blending with the surrounding stucco.
- For horizontal cracks – Fill small cracks with a high-quality elastomeric sealant. You might reinforce larger cracks with mesh tape and apply a stucco repair mix. Follow this by careful blending and painting.
- For corner cracks – Clean out the crack, apply a bonding agent, and use a stucco patching material. Reinforce the repair with a corner bead or mesh tape (if needed), ensuring a smooth finish.
- Pattern cracking – Clean the surface, apply a stucco patch, and smooth it out. For extensive pattern cracking, re-stucco the entire affected area.
- Structural cracks – Structural cracks are severe and require professional assessment. Temporary repairs may include filling with epoxy or polyurethane injection to stabilize the crack. Permanent solutions might involve foundation repair, followed by re-stuccoing.
Drying and curing
Drying and curing times for different repair materials and tips for safely speeding up the process
Drying and curing are completely different things.
Drying time refers to the period required for the repair material to become surface dry. Curing time is the duration needed for the material to reach full strength and durability. Always follow manufacturer instructions for specific products.
Corresponding to the repair techniques for every stucco crack mentioned earlier, here are the time frames for drying and curing different repair materials. This section also provides tips to speed up the drying and curing process safely.
1. Hairline cracks
- Drying: 24 hours
- Curing: 1 to 2 days
- Tips to speed up: Ensure proper ventilation. Use fans or a dehumidifier to reduce humidity.
-
2. Map cracking
- Drying: 4 to 6 hours
- Curing: 1 to 2 days
- Tips to speed up: Use thin coats to reduce drying time. Apply each coat after the previous coat has become dry to the touch.
-
3. Diagonal cracks
- Drying: 48 hours
- Curing: 7 to 10 days
- Tips to speed up: Use quick-setting repair compounds. Keep the area warm and dry.
-
4. Vertical cracks
- Drying: 24 hours
- Curing: 1 to 2 days
- Tips to speed up: Maintain a warm and dry environment. Use fast-curing products.
-
5. Horizontal cracks
- Drying: 24 to 48 hours
- Curing:7 to 10 days
- Tips to speed up: Use fast-curing products. Increase airflow with fans.
-
6. Corner cracks
- Drying: 24 to 48 hours
- Curing: 7 to 10 days
- Tips to speed up: Apply a thin initial layer. Use heat lamps or fans cautiously.
-
7. Pattern cracking
- Drying: 4 to 6 hours
- Curing: 1 to 2 days
- Tips to speed up: Ensure good ventilation.
-
8. Structural cracks
- Drying: 48 hours
- Curing: 7 to 14 days
- Tips to speed up: Perform repairs during dry and warm weather. Use dehumidifiers and fans to control moisture.
Always follow the manufacturer’s instructions for the specific products used and avoid shortcuts that might compromise the integrity of the repair.
Pre-painting preparations

Sanding the repaired areas: techniques for a smooth finish
- Use the right sandpaper – Use medium-grit sandpaper (120-150 grit) for initial sanding and fine-grit (220-240 grit) for a smooth finish.
- Sand evenly – Sand in a circular motion to ensure the surface is even and blends with the surrounding stucco.
- Check progress – Check the smoothness frequently by running your hand over the area.
- Dust removal – Use a brush or vacuum to remove dust from the surface before applying primer.
Applying a primer: Choosing the correct primer and application tips
- Choose the correct primer – Use an exterior acrylic latex primer for stucco. Ensure it is suitable for masonry surfaces.
- Surface preparation – Ensure the surface is clean and dry.
- Application tips:
-
- Use a roller with a thick nap (3/4 inch or more) to cover the stucco’s textured surface evenly.
- Apply the primer thinly and evenly to prevent drips and runs.
- Allow the primer to dry completely before painting, usually 24 hours.
Painting tips
Selecting paint compatible with stucco:
- Acrylic paint – This type of paint is highly recommended due to its flexibility and durability. It can handle stucco’s texture and movement.
- Elastomeric paint – Offers excellent waterproofing and crack-bridging properties, ideal for stucco surfaces.
- Masonry paint – Specifically formulated for porous surfaces like stucco, providing good adhesion and breathability.
Techniques for even application and aesthetic considerations
- Surface preparation – Clean the stucco thoroughly to remove dirt, debris, and previous peeling paint. Repair cracks or damage.
- Primer – Apply a masonry primer to ensure better adhesion and uniform paint absorption.
- Brush and roller – Use a high-nap roller for textured surfaces and a brush for edges and detailed areas.
- Spray painting – Use a paint sprayer for a more uniform application, especially on large areas.
- Multiple coats – Apply at least two coats of paint. It allows adequate drying time between coats.
Color considerations: Choose colors that complement the architectural style and surroundings.
- Lighter shades can help reflect heat.
- Darker shades may provide a bold aesthetic but absorb more heat.
Additional tips
- Paint during mild weather to ensure proper curing.
- Use high-quality paints to ensure longevity and resistance to weather elements.
Maintenance tips
Regular maintenance can extend the paint‘s life and keep the stucco looking fresh.
Regular inspection schedules
- Monthly – Inspect for signs of new cracks, discoloration, or damage.
- Biannually – Conduct a more thorough inspection, checking for water damage, mold, or areas where the stucco may pull away from the building.
- Annually – Have a professional inspect the stucco to assess its condition and identify areas needing touch-ups or repairs.
Preventive measures to avoid future cracks
- Control moisture – Ensure proper drainage around the foundation. Doing so prevents water from accumulating and causing cracks.
- Seal joints and openings – Regularly check and seal expansion joints, windows, and doors to prevent water infiltration.
- Maintain structural integrity – Address underlying structural issues promptly to prevent stress on the stucco.
- Apply quality paint – Use high-quality and flexible paint to allow for minor movements and prevent cracks from developing.
- Monitor vegetation – Keep trees and shrubs trimmed away from the stucco. Doing so prevents roots from causing damage and allows proper air circulation.
Conclusion
Proper stucco repair techniques help maintain a building exterior’s integrity, durability, and appearance. Prompt repairs ensure minor issues do not escalate into significant structural problems. It extends the lifespan stucco’s lifespan and preserves its aesthetic appeal.
Custom Painting, Inc.’s timely and skilled stucco repairs help prevent water infiltration, mold growth, and further damage. Our team of expert painters safeguards your property’s health and value. Serving the Bay area including the cities of Moraga, Mountain View, Orinda, Pleasant Hill and San Jose.
For inquiries or requests for a free job estimate, call us at 925-294-8062 or message us here.