
Popcorn ceilings were popular in mid-20th-century homes. Their bumpy, textured appearance was initially prized for hiding imperfections and absorbing sound. However, times have changed, and so have design trends. Today, many homeowners see popcorn ceilings as outdated and unattractive.
If you’re tired of looking at your popcorn ceiling and want to give your room a modern, fresh look, you’re in the right place. Repainting your interior walls and ceilings is more difficult if there are still popcorn ceilings. But if you follow the right process of removing them, house painting can be a lot easier.
Whether you’re a seasoned DIY enthusiast or a first-time home renovator, our easy-to-follow instructions will help you transform your ceiling from drab to fab!
Why Should You Consider Removing a Popcorn Ceiling?
Popcorn ceilings might have been all the rage back in the day, but there are several compelling reasons why you should consider removing them now. Let’s break it down:
1. Aesthetic Improvement
The visual upgrade is one of the most immediate benefits of removing a popcorn ceiling. Popcorn ceilings can make a room look dated and drab. By removing the textured surface, you’ll achieve a cleaner, more modern look that aligns with contemporary design trends. A smooth ceiling can make your home feel more open, bright, and welcoming. Whether you’re planning to sell your home or simply want to enjoy a refreshed living space, this change can significantly enhance the overall appearance of your interiors.
2. Potential Health Concerns
Many popcorn ceilings installed before the 1980s contain asbestos, a hazardous material. Asbestos was banned from textured paint, patching compounds, drywall, and other building materials in 1977 by the U.S. Consumer Product Safety Commission due to its carcinogenic properties. Before this ban, asbestos was commonly used because it was an effective thermal and acoustic insulator and a fire retardant.
Consequently, many popcorn ceilings installed before 1977 contain asbestos. Even homes built shortly after 1977 might have asbestos-laced products, as they were still in circulation for some time. Asbestos fibers can become airborne if your ceiling has asbestos and it’s disturbed during cleaning, repairing, or remodeling. Inhaling these fibers poses serious health risks, including lung cancer and mesothelioma.
Even if your popcorn ceiling doesn’t contain asbestos, the textured surface can trap dust and allergens, which isn’t ideal for a healthy living environment. Removing the popcorn texture can help create a safer, cleaner space for you and your family.
3. Easier Maintenance
Popcorn ceilings are notorious for collecting dust and cobwebs, making them difficult to clean. The uneven texture can also complicate repairs. For example, if there’s a water stain or a small crack, it can be hard to fix it without making the problem area more noticeable.
Once you have a smooth ceiling, maintenance becomes much simpler. You’ll find it easier to paint, clean, and repair, saving you time and effort in the long run.
4. Increased Home Value
Removing the popcorn ceiling can be a smart investment if you consider selling your home. Many potential buyers see popcorn ceilings as a negative feature and might be deterred by the prospect of having to remove them themselves. A home with smooth, updated ceilings can attract more buyers and potentially increase your property’s value. It’s a relatively small improvement that can make a big difference in your home’s market appeal.
5. Better Lighting
Popcorn ceilings can affect the way light is distributed in a room. The textured surface casts shadows, which can make a space feel darker and more confined. A smooth ceiling, on the other hand, reflects light more evenly, helping to brighten up the room. This can make your home feel more spacious and inviting.

Different Methods to Remove a Popcorn Ceiling
Now that you know why removing a popcorn ceiling can be a great idea, let’s dive into the different methods you can use to tackle this project. But before that, here are some important things to consider first:
1. Test for asbestos
If your home was built before or around 1977, it’s crucial to have your ceiling material tested for asbestos. EPA-approved test kits are available for about $35 to $50, providing peace of mind. You can typically expect results within a week.
If the test comes back positive for asbestos, it’s best to leave the removal to professionals. If it’s still in good condition, leave it undisturbed to minimize health risks caused by asbestos exposure.
2. Use proper protective gear
Whatever method you choose for removing a popcorn ceiling, make sure you got proper protective gear. Get some safety goggles, dust mask or respirator, gloves, and coveralls. Also, keep a vacuum and damp cloths handy for cleaning up dust and debris as you work.
3. Ventilation
Open windows and use fans to ensure proper ventilation while you work. This will help reduce dust and improve air quality.
4. Turn off power
Before you start, turn off the power to any ceiling fixtures to avoid the risk of electrical shock. Remove or cover light fixtures and ceiling fans to protect them from dust and debris.

Now, here are the three primary methods:
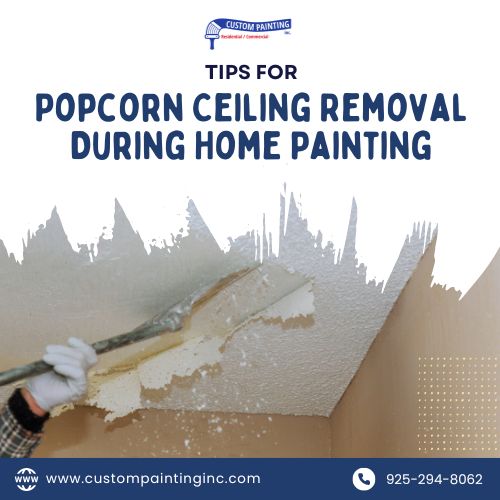
Method #1: Scraping
Scraping is the most common method for removing a popcorn ceiling. It involves wetting the ceiling and then scraping off the texture. This method is straightforward but can be messy and time-consuming. However, it’s very effective if done correctly.
Tools and Materials Needed:
- Plastic sheeting and drop cloths
- Painter’s tape
- Water sprayer
- Scraper or putty knife
- Safety goggles and mask
- Ladder
- Joint compound and sandpaper (for finishing)
Instructions:
- Prepare.- Remove all furniture and cover the floor with plastic sheeting or drop cloths. Secure the plastic sheeting to the walls with painter’s tape. Wear safety goggles, a dust mask, and gloves.
- Wet the ceiling.- Fill a garden sprayer with water. Working in small sections, lightly mist the ceiling with water. Allow it to soak for about 15 minutes. This will soften the texture and make it easier to scrape off. Be careful not to over-wet so as not to damage the surface of the drywall.
- Scrape the popcorn texture.- Gently scrape off the popcorn texture using a wide scraper or putty knife. Hold the scraper at a slight angle, and be careful not to damage the drywall underneath. Work systematically across the ceiling in small sections.
- Smooth and finish.- After scraping, some imperfections may remain. Apply a thin layer of joint compound to smooth out any rough spots. Once the compound is dry, sand the surface until it’s smooth.
- Clean up.- Vacuum the floor and wipe down the walls to remove any dust. Your ceiling is now ready for priming and painting.
Method #2: Covering with Drywall
If scraping sounds too messy or if your ceiling contains asbestos, covering it with a new layer of drywall might be a better option. This method involves attaching drywall sheets directly over the existing ceiling, providing a fresh, smooth surface. It’s a cleaner process and encapsulates any potential asbestos without disturbing it.
Tools and Materials Needed:
- Drywall sheets
- Drywall screws
- Drill or screwdriver
- Tape measure and utility knife
- Joint tape and joint compound
- Sandpaper
Instructions:
- Prepare.- Measure the dimensions of your ceiling and cut the drywall sheets to fit. You may need a helper to handle the large sheets. Remove or cover furniture and protect the floor with drop cloths.
- Attach drywall.- Use drywall screws to attach the sheets to the ceiling joists. Ensure the screws are flush with the surface of the drywall. A cordless drill with a drywall bit makes this job easier.
- Seal joints.- Place joint tape over the seams between the drywall sheets. Spread the joint compound over the tape and screws to create a smooth surface. Let it dry, then apply additional layers as needed.
- Smooth and finish.- Once the compound is dry, sand it smooth to ensure a seamless finish. After sanding, your new drywall ceiling is ready for priming and painting. Choose a primer and paint appropriate for ceilings to achieve the best results.
Method #3: Skim Coating with Plaster
Skim coating is another way to achieve a smooth ceiling. This method involves applying a thin layer of plaster over the popcorn texture and then smoothing it out. It’s less messy than scraping and can create a beautiful, even finish. It does require some skill to apply the plaster evenly, but it’s a great option if you’re comfortable with a bit of DIY finesse.
Tools and Materials Needed:
- Plaster or joint compound
- Trowel or wide putty knife
- Sanding sponge or sandpaper
- Ladder
- Mixing bucket and drill with mixing attachment
Instruction:
- Prepare.- Cover floors and furniture with plastic sheeting. Protect walls with painter’s tape. Mix the plaster, following the manufacturer’s instructions, to achieve a smooth, spreadable consistency.
- Apply plaster.- Using a trowel or wide putty knife, spread a thin layer of plaster over the popcorn texture. Work in small sections and aim for an even application. As you apply the plaster, use the trowel to smooth it out. This step requires some finesse, so take your time to achieve a uniform surface.
- Smooth and finish.- Allow the plaster to dry, then sand it down until the surface is smooth. Depending on the product used and room conditions, this could take several hours or overnight. You might need to apply a second coat for a perfect finish. Once done, the ceiling is ready for paint.
Conclusion
If you have a popcorn ceiling at home, removing it allows you to give your ceilings a fresh and modern look—which can potentially increase their value. Whether you opt for scraping, covering with drywall, or skim coating with plaster, each method offers a pathway to a smooth, updated ceiling. You can confidently tackle this project by following these steps, using the right tools, and taking necessary precautions.
If you ever feel unsure or overwhelmed, don’t hesitate to seek assistance from professionals. Custom Painting, Inc. is ready to help you enhance your home’s aesthetics. For expert help, contact Bay Area Custom Painting, and let us bring your vision to life.