When planning a house painting project, and you decide to hire a contractor, make sure cleanup is part of the contract. While it’s often overlooked, cleanup is essential for a smooth and satisfactory finish. Ensuring the cleanup process is well-defined protects your investment and keeps your home safe and pleasant post-painting.
In this post, let us discuss the essential steps for cleaning up after a paint job. Whether you or the contractor will do it, it’s essential that you know what to do so no tasks are overlooked.
Prepare for Cleanup
Efficient cleanup starts with proper planning. Before painting begins, discuss the cleanup process with your contractor and include it in the contract. This agreement should detail who is responsible for each aspect of the cleanup and the standards to be met.
Plan ahead
Planning ahead involves setting clear expectations with your contractor about the cleanup tasks and determining a timeline for when the cleanup will occur relative to the painting schedule. Identify any specific areas or items that require special attention during cleanup.
Gather the necessary supplies
Gathering the necessary supplies is also crucial. Make sure you have enough drop cloths, rags, and cleaning solutions suitable for paint removal. Don’t forget protective gear like gloves, masks, and safety glasses to protect yourself from fumes and chemicals. Have heavy-duty waste disposal bags ready for disposing of paint cans, used painter’s tape, and other waste materials.
Lastly, ensure you have the right cleaning tools, such as brushes, rollers, scrapers, and containers for cleaning and storing tools used during painting.
Remove Painter’s Tape
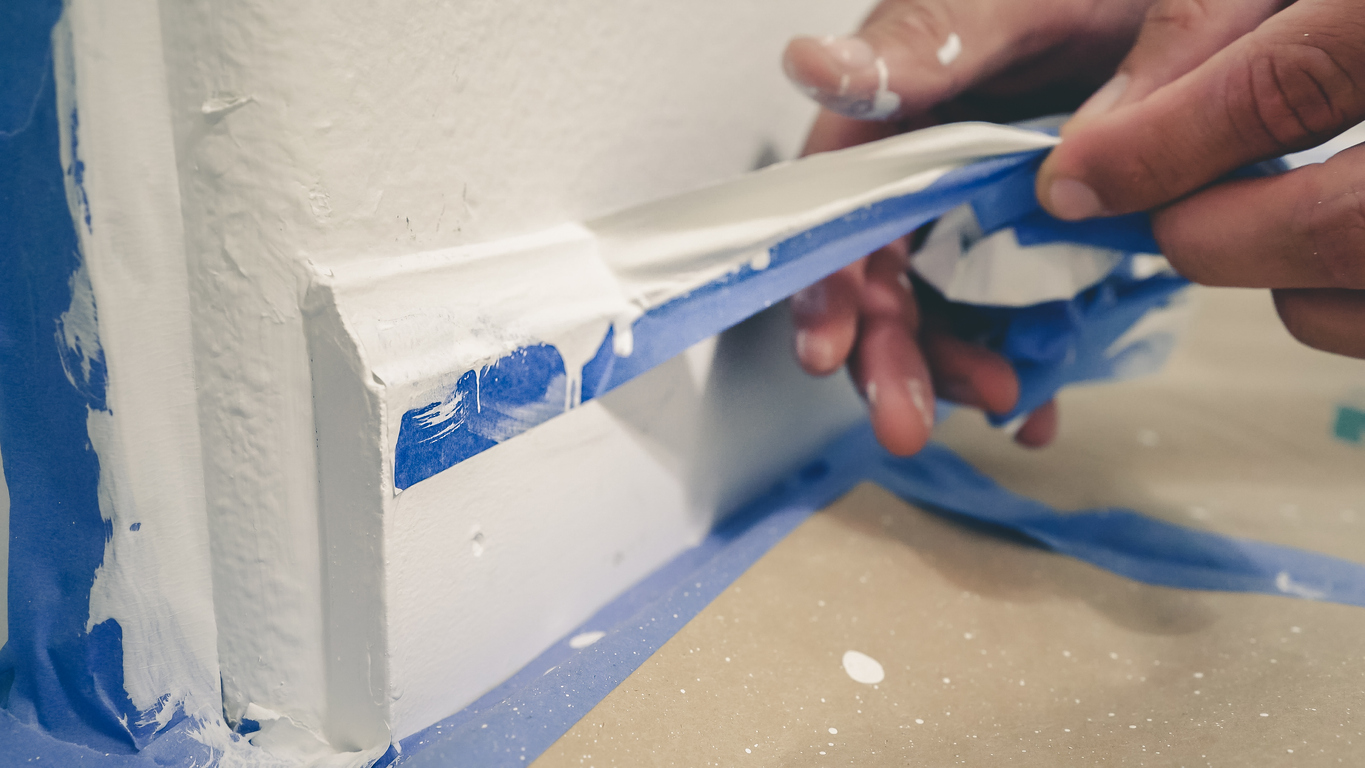
It’s essential to remove the painter’s tape at the proper time to achieve clear, sharp lines. Removing it too early or too late may cause damage to your freshly painted surfaces. You should remove the painter’s tape while the paint is still slightly wet. This helps to avoid peeling off any dried paint along with the tape. If the paint has already dried, score along the edge of the tape with a sharp utility knife before removing it to avoid pulling up the paint.
For the best results, pull the tape at a 45-degree angle to the surface. Move slowly and steadily to prevent tearing or leaving adhesive residue on the surface. If you encounter resistance, use a hairdryer to heat the tape slightly, softening the adhesive and making removal easier.
Clean Brushes and Rollers
One of the most important cleanup tasks is cleaning your brushes and rollers. If you try it the DIY way, you probably spend a considerable amount because quality tools usually cost more. It’s important to ensure that you can still use them in the future. If you leave the residual paint to dry in your tools, it will be harder to remove it, and you might damage them as you try to.
Latex paints
For latex paints, start by rinsing brushes and rollers under warm running water to remove as much paint as possible. If the paint has dried slightly or is stubborn, use a mild soap or detergent to help break down the paint. Work the soap into the bristles or nap, then rinse thoroughly until the water runs clear.
Oil-based paints
For oil-based paints, use paint thinner or mineral spirits. Pour a small amount into a container and swirl the brushes or rollers until the paint is dissolved. Remember to dispose of these solvents properly. Never pour paint thinner or mineral spirits down the drain. Instead, these solvents should be disposed of according to local hazardous waste disposal regulations. Many communities have designated drop-off locations for hazardous materials.
Dispose of Paint and Hazardous Materials
Properly disposing of paint and hazardous materials is crucial for safety and environmental health.
First, identify hazardous materials such as leftover paint (both latex and oil-based), solvents, and old paint cans. Check your local guidelines for hazardous waste disposal since many areas have specific regulations. Take paints and solvents to designated disposal sites or look for community drop-off events for hazardous materials. If you have leftover paint that is still usable, consider donating it to community centers or charities.
Clean Paint Trays and Other Tools
Keeping your paint trays and tools clean ensures they last longer and are ready for your next project. Start by removing excess paint from the trays by pouring any leftover paint back into the can or a disposable container. For latex paint, rinse the tray with warm water. For oil-based paints, use paint thinner.
Use a mild soap and a scrub brush to clean any remaining paint from the trays, then rinse thoroughly and let them air dry or wipe them with a clean cloth. Store brushes and rollers in their original packaging or hang them up to maintain their shape. Wipe off excess paint from scrapers and putty knives immediately after use and store them in a dry place. Clean buckets and containers thoroughly with appropriate solvents and store them upside down to prevent dust accumulation.
Make Some Final Touches
After the main cleanup, it is important to ensure everything is in perfect order. Walk through the painted area to check for missed spots, drips, or uneven coverage. Keep a small amount of paint and a brush handy for quick touch-ups.
Make sure all brushes, rollers, and trays are clean and dry before storing them in a dry, safe place. This helps prevent damage and keeps your tools in good condition for future use.
Consider the Environment
When cleaning up, consider making fewer disruptions to the environment. Use biodegradable cleaners that are safe for the environment and break down naturally. Choose non-toxic cleaning agents that are free from harmful chemicals. Reuse materials whenever possible by cleaning and reusing brushes, rollers, and trays. Many recycling centers accept empty paint cans, so check your local guidelines for paint disposal and recycling. Opt for products with minimal or recyclable packaging to reduce waste.
Leave it to the Professionals
Sometimes, the cleanup after a painting project can be overwhelming, and hiring professionals can be a smart choice. Consider hiring professionals if the project is big, if your schedule is tight, or if there are hazardous materials that should be handled. Professional cleaners bring expertise and know the best techniques to ensure a thorough cleanup. They can complete the task quickly and efficiently, saving you time and effort. Plus, professionals provide high-quality results, leaving no mess behind and ensuring your home looks pristine.
Conclusion
When you get a contractor for your painting project, ensure it includes cleanup to lessen the hassle for you. It ensures that your house remains neat, your tools last longer, and you adhere to environmental safety standards. Keep your cleaning supplies and tools organized and easily accessible. Clean your tools after each use to keep them in good condition. Always opt for eco-friendly products and proper disposal methods to minimize environmental impact. By following these guidelines, you can enjoy a beautifully painted home without the stress of a messy aftermath.
If you’re looking for a contractor that offers every painting, including cleanup, look no further. Custom Painting, Inc. offers all kinds of residential painting services, from initial consultation, color selection assistance, preparation, and execution to cleanup. Call us at 925-294-8062 or fill out our online contact form to schedule an appointment.


